(note: this post contains affiliate links)
Isn’t it awesome how many free internet tools we have nowadays ? One free tool that has become quite popular is PicMonkey. It’s allows you to edit your photos, create eye-catching graphics, and to create collages. Today I’m going to show you how to do something else: how to make recipe cards in PicMonkey.
You can use your recipe cards to document recipes that your family loves, they can be used to fill a recipe card box to be given as a gift, or you can make your own recipe album by placing the cards in a photo album. You can even use these same steps to create gift tags for food gifts too.
TIP: If you have your own blog, you can also use this to create a recipe card for a recipe on your blog so you can give your readers a free download.
Ready to get started? Let’s go!
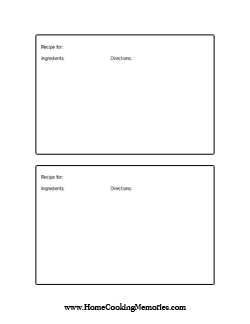
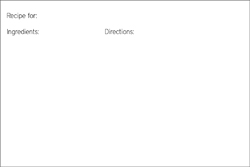
The first step is to download this free printable recipe card that I have created. I intentionally made the recipe card basic with a white background so you could add your own creative touches to it in PicMonkey. It is sized 4×6″ and is 300dpi. I have provided both a single recipe card, or an 8.5×11″ sheet with 2 recipe cards on it. Click below to download and pay attention to where you download the file.
Click the links or images below to download your free recipe card printables. After you click, it will open up a high resolution image of the recipe card(s). On that image, right-click and save to your computer.
Free Printable Recipe Card Sheet (2 cards)
Free Printable Recipe Card (single)
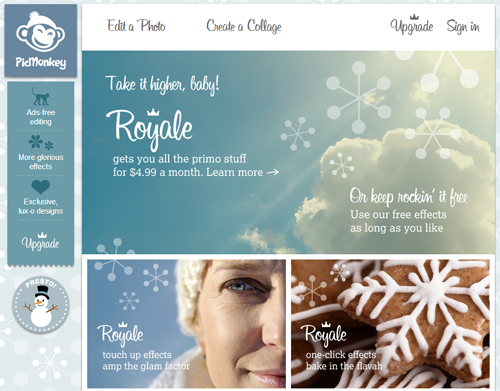
Go to PicMonkey — you don’t have to create an account to use their service, but you can, if you wish.
There is also premium “Royale” items you can pay for (which are very helpful) but my tutorial will use only the free items at PicMonkey.
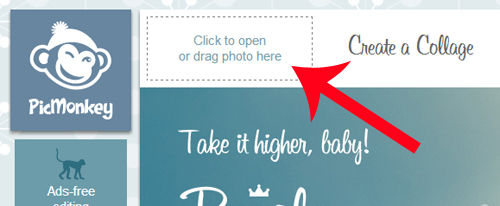
Click on “Edit a Photo” at the top of the screen. This will pop-up a window that will allow you to find the recipe card you downloaded. Locate the file, click once on it to select it, and then click “open”.
For this tutorial, I will be working with the single recipe card, but the steps are the same for both cards.
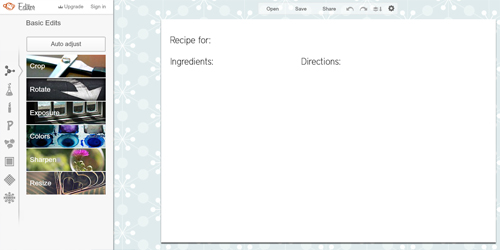
When the recipe card is opened in PicMonday, it will look like this:
To start adding text to your recipe card, you will do the following:
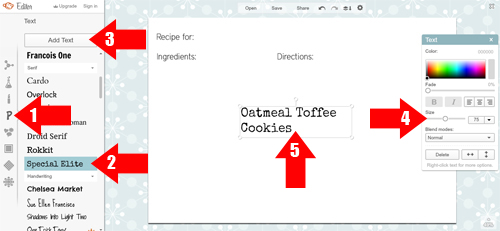
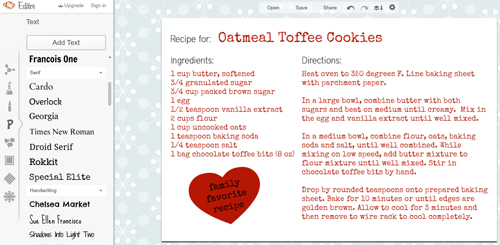
1. Click on the “P” on the right to select the text tool
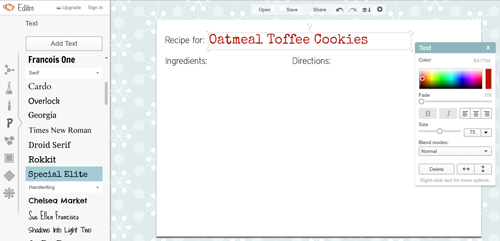
2. Select the font you wish to use (I selected “Special Elite”).
3. Click the “Add Text” box above the font choices. This will create a text box in the middle of your recipe card. It will also pop up a box with several text options (colors, size, etc).
4. Change the font size, if you wish. For my title, I kept it around 75.
5. Click once in the text box that says “type your text here”. Type the title of your recipe and then click once outside of the text box.
Now, you certainly don’t want that recipe title in the middle of your recipe card, right? To move it to the top, simply hover over the text you typed and you will see your cursor become a “plus” sign with arrows. Click on the text and while holding, drag your title to the top of the card where you want it. Release your mouse when are happy with the placement.
To make it so your text won’t be on two lines, you just need to hover over the right side of the boundary box, click on the right border and drag it out to the right so the text will be on one line only.
To change the color of the text, click once on the title, which will put the boundary box around your title again. To to the text options box, and select the color you wish to use. Click once outside of the box to accept the changes you made. Note: you can set the color before typing, if you wish.
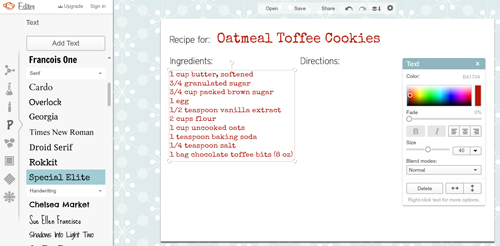
Type your recipe ingredients the same way you did the title, except you’ll probably want a smaller font size (I used a size 40). As you type your list, hit “enter” on your keyboard after each line and then type the next ingredient. Hover over the box and click and drag to position the text where you would like it. You can also make the box wider, by clicking on one of the sides and dragging it out a bit.
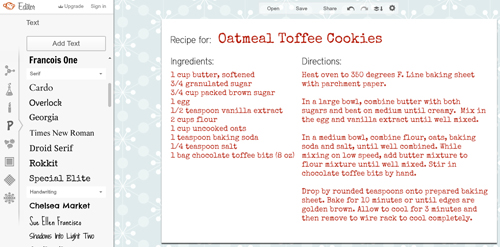
Repeat the steps above with the recipe instructions.
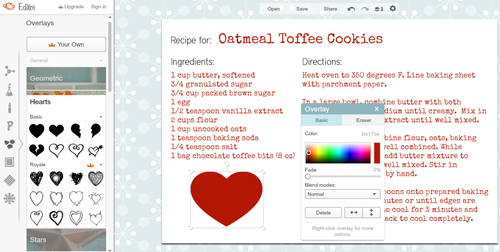
There are many ways to add decorations to your recipe card. Some of the paid options are really nicely designed, but you could also use the free options. I decided to add a heart on mine, which is in the “overlays” section on the left of the screen. You create these designs similar to how you created the text.
You can even add text on top of the overlays. I typed “family favorite recipe” on top of my heart.
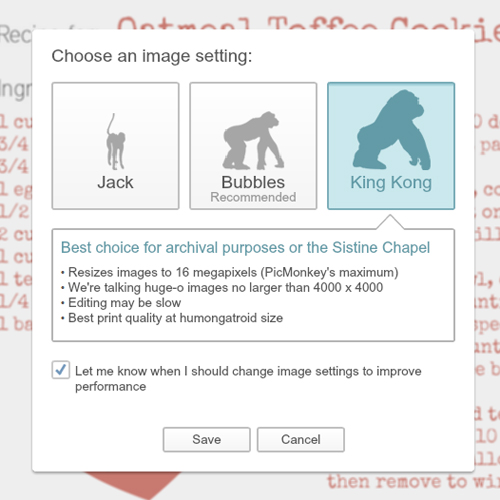
Now you are ready to save. Click on the little wheel at the top of your PicMonkey window and you can change your image settings. By default, it will be set to “Bubbles”. Because most recipe cards are printed, I recommend using “Bubbles” or “King Kong” (I used King Kong).
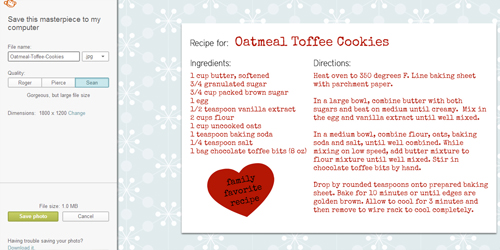
Now click “save” at the top of your PicMonkey window. On the left, it will give you a few options. Give your recipe card a name and also choose a “quality”. I chose “Sean”. Down towards the bottom, click on the green button that says “save photo”.
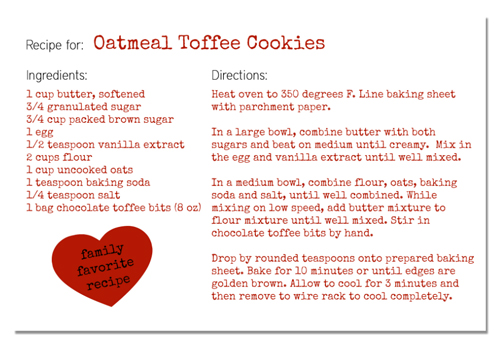
Your recipe card is now saved to your computer where you can print it and share it!
Of course, this is just one way to make recipe cards in PicMonkey. And, if you purchase their premium “Royale” items, you can get even more creative. If you make your own recipe card in PicMonkey, I would love to see them! Post it on the Home Cooking Memories page on Facebook.
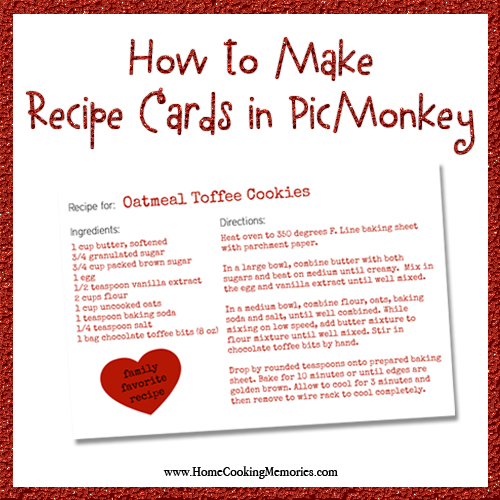
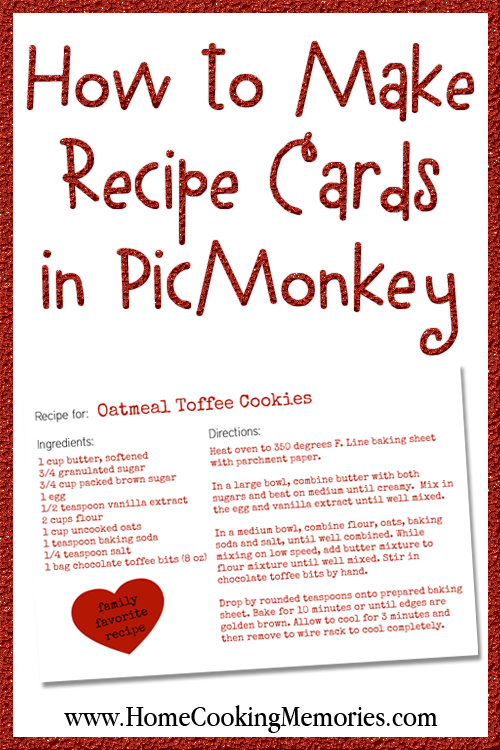
I hope you find this tutorial on making recipe cards in PicMonkey beneficial — if any part is confusing or if you need any help, don’t hesitate to leave me your questions in the comment area below. I’m happy to help!
Christine says
I thought this was a service that printed the recipe on a card but it is just paper and you have to type it?
Dawn says
I love this tutorial of yours I have trying to figure out a way to copy some recipes from a few different cooking magazines I have downloaded without the need to get a writing cramp or to have very messy penmanship. And now since I have read this tutorial I hope to get started on this soon. Plus I will also be sharing this tutorial on my blog as well. I will be showing my finished results with my version of the recipe card and then I will link to your tutorial.
I hope you don’t mind it to much.
Lora says
I tried editing the recipe on picmonkey, but it won’t let me do anything with it…
Can you help please?
Wendy says
I too found you on Pinterest and Love your idea! I am making a cookbook for each of my daughters for a Christmas gift and this is such an amazing idea~
Thank you for sharing!!
Wendy
Anila Jain says
I have already read about making website header using PicMonkey so creating recipe card is now seeming to me now more easier. Thank you for showing each of the step with associated images here, its gonna help all indeed.
Susan says
Thank you so much for you to your tutorial it was a big help. I was struggling with how to do a recipe card to put in my blog this was perfect
Christine Gallagher says
Thank you so much for this post, I just found pic monkey and I already loved it but didn’t know much about what it can do, now you made me love it even more, I can’t wait to check it out further, I created my first recipe post on my new blog because of your post and I THANK YOU <3
Ashley says
I found you via Pinterest and this was so helpful! Thanks so much for sharing!
Gwen says
Can you edit a recipe card once it is saved? I post a lot of recipes to Facebook and need to edit after I post. Is this possible with PicMonkey?
Bev Matheson aka Beverooni1 says
Thanks!
Susan DuBois says
This tutorial is fabulous! Thanks so much for detailed instructions. My only question is how to link to a .jpg file in my blog (in WordPress)?
Susan
Brandi says
Thank you for the recipe card download! Can’t wait to add these cards to all of the recipes I post on my blog!
Deirdre says
Thank you Brandie!! I was working on a cookbook for my daughter and it was becoming a nightmare trying to find a plain template since I already had the card stock. Your tutorial was very easy to understand and you’ve helped me turn out a beautiful gift.
Kimberly Leverett Osburn says
Can someone help me with the best way to add your recipe cards to your blog? Thanks in Advance. <3 Kim
ShaRhonda @ The 4-Crow's says
Thanks you for the template. I have wanted something like this on my bog for forever! I love PicMonkey. YOU are the best. I posted my card today and gave you a link back.
http://www.the4crows.com/2013/08/im-foodie-friday.html
Roechelle says
Thank you so much for sharing this, you rock 🙂
Roe
Alison Wood says
Thanks for sharing these great ideas. I enjoy picmonkey so much! New follower here on Pinterest. Looking forward to more recipes!
Katie says
I found your article on Pinterest, and I LOVE it! This has been so helpful, not just to make the recipe card, but also in editing my photos of my recipes. I used it for the first time today and added it to my recipe. Thank you so much for the tutorial!
http://cultivatingtrio.com/2013/04/07/pb-j-pancakes/
nidha says
Thanks a ton!! Brilliant idea! Now i can create pretty recipe cards for keepsake.
Erin says
Can’t wait to try this!! Thank you!!
Barbara Mascareno says
What a great idea! Especially for mommies who collect all sorts of recipes.
The Ninja Baker says
Thank you for this recipe, Brandie. I was eyeing toffee bits in the market the other day and wondering how I might use them. So, thank you for this scrumptious sounding oatmeal cookie recipe. Very much appreciate, too, your kindness in allowing reprints of the recipe =)
Suzanne @ Pieced Pastimes says
Love this idea! I need to redo my recipe box and this will be perfect. Thanks for sharing.
MomMom Hill (PassionateParent.com) says
Love the idea and the tutorial… I am a huge fan of PicMonkey, so this makes me love that site even more! I plan on using your cards to make a Giveaway for our new site’s launch this Monday (PassionateParent.com). Thank you for sharing this!
Lyuba @willcookforsmiles says
What a wonderful idea, Brandie! Thank you for sharing!
Gaby {lifeineight.com} says
Hi Brandie! I’m visiting you from Tatertots & Jello. I have to admit I’ve never used Picmonkey myself but I’ve recently discovered a great free web editor called Pixlr (http://pixlr.com/editor/). It even let you use layers!. I’ve also just found out that Adobe has released Photoshop CS2 for free!! Ok, it’s a 10 years old version but more than enough to do everyday bloggy editing (http://www.adobe.com/downloads/cs2_downloads/index.html).
Gaby x
brandie says
Hi Gaby! Nice to meet you! Pixlr is a great one to use too. I didn’t know about Photoshop CS2 being free…I’ll keep that in mind because I have some friends who might want to download. My usual everyday program is Photoshop CS5, but I know it’s expensive and has a steep learning curve, so PicMonkey is a great free alternative for simple photo edits and things like a recipe card.
Kimberly Leverett Osburn says
Hey Gaby
Thanks for sharing about Photoshop CS2
Claire @ A Little Claireification says
Fantastic!! I love using PicMonkey for collages – this is a great tutorial. Thanks so much!! 🙂
Claire
Jen @JuanitasCocina says
This is amazing Brandie! I can’t wait to use these!
Jill says
This has to be one of the most fabulous tutorials ever! So creative and helpful!
Thank you!
Jill says
In fact, I might need to go back through every recipe I’ve ever posted and do this!
Melissa Lawler says
That is an absolutely brilliant idea! Thank you!
sunithi says
Nice ! I use pic monkey a lot for other edits. even pd for premium since it’s cheap. Just never explored all the features. This is cool . looks neat & nice. I must try this out !
brandie says
Thank you, Sunithi! After working on this tutorial I’m seriously considering the premium too, it looks like there is lots of cool features.