
For Thanksgiving this year, I wanted to make a table decoration that incorporated family photos since there was so many family members that we wouldn’t be able celebrate with this year. A photo cube seemed like a perfect way to dress up our table, while also remembering our loved ones near and far. I decided to fancy it up even further by making it a candle holder.
To make a Photo Cube Candle Holder, some of the things you will need are:
- Elmer’s Foam Board
- Elmer’s CraftBond Adhesives (such as Elmer’s CraftBond Glue Pen and Elmer’s CraftBond Extra Strength Glue Stick)
- X-ACTO Knife
- Painters Opaque Paint Markers
- Glass votive holder (that is wider on the top than the bottom)
- Votive candle
- Raffia or Ribbons
- 4 photos or scrapbook layouts
- Pins
- Scissors
- Pencil
- Ruler
- Acrylic Paint
- Foam Brush or other Paintbrush
- Curling Iron (optional)
Not all items are shown below and excuse the fact that I have 3 votives & 3 candles in this photo below…you only need one per photo cube.
You can view my complete shopping trip for this craft project here on Google+: Photo Cube Candle Holder #GlitterNGlue

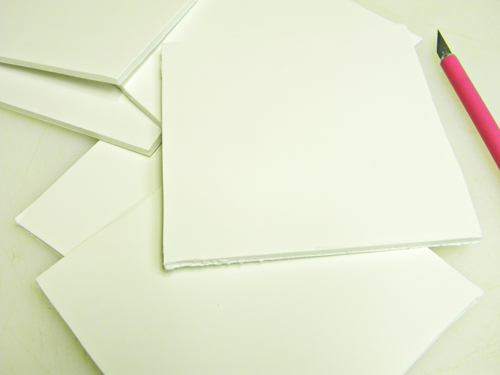
The first step is to measure 5″ squares on your Elmer’s Foam Board. I did this with a ruler and a pencil. You will need four 5″ squares of foam board. If you wish your photo cube to be smaller, you can cut smaller pieces, but I liked the 5″ size.

Using the X-ACTO knife, carefully cut out the squares. I do this by lightly cutting the top of the foam board first, and then going through again to make the deeper cuts which fully cuts out the squares. Be sure to take care with the knife and project the surface under your foam board. Also, make sure you are cutting with a new blade — an old blade won’t give you a clean cut.

After the four 5″ pieces are cut, you will temporarily assemble them into a partial cube, using pins to secure them as shown in the image below:

Take your partially assembled cube and place it on top of the remaining foam board you have left. Using a pencil, trace the cube you’ve just assembled to make a top for your cube.

Cut out the top for your cube with the X-ACTO knife. Trace a circle that is slightly smaller than the largest part of your votive holder. I found this plastic container that was a bit smaller than the largest part of my votive holder.

With the X-ACTO knife, cut out the circle and attach it to the top of the cube sides, using the pins to secure it in place.

Working with one area at a time, remove two pins and apply a line of Elmer’s CraftBond glue to one of the edges and press the edges back together. Use the pins again to keep it together (you’ll be able to remove them later after it dries). Repeat with all the edges, until all the sides have been glued together.

While the glue is drying, prepare your photos or scrapbook layouts. I scrapbook digitally, so I picked some of my favorite digital scrapbook layouts and resized them on my computer so that they were 5×5″. I printed them on cardstock and then trimmed them.

After the glue has been applied to all edges and has dried, remove the pins. Using acrylic paint in a color of your choice, paint the photo cube. I painted mine with a brick red color. I painted one coat, that you see in the photo below.

After that dried, I painted another coat to fully cover the foam board. Below you see it when it was almost completely painted:

After the paint fully dried, I used the Elmer’s CraftBond Extra Strength Glue Stick to attached the digital scrapbook layouts that I have printed (this glue stick works great for photos or scrapbook layouts like this and it won’t pop off like you might find with traditional school glue sticks).

After the photos or scrapbook layouts are attached, apply raffia to the corners. I applied a thin line of the CraftBond Glue Pen down along the photo cube corner and laid a strand of raffia on top of it. I repeated this with 4-5 strands of raffia per corner. It was further held in place with more glue on the underside of the top and the underside at the bottom.

Using a curling iron (yes, the one I use for my own hair!), I curled additional pieces of raffia (about 2 strands per corner). Be sure to use the same great caution you use when you curl your hair. The length of time needed to achieve a “curl” with the raffia depends on your curling iron, but don’t leave it on too long or it will scorch the raffia. If you find that the raffia doesn’t curl enough when you remove it, just repeat and leave it on a bit longer.

Attached the curled pieces near the top opening, gluing one end on the underside of the top, adding a few curl strands near each corner.

Using Painters Paint Pens, you can add greetings, the date, quotes, or anything else you wish to write on the very top of the photo cube.

For us, each guest at our Thanksgiving dinner signed their name, plus we add a few other things like “Thanksgiving 2011” and “Happy Turkey Day!”. The votive holder is set in the circle that you cut out and the votive is placed in the votive holder.

Here is the completed photo cube candle holder, as part of my Thanksgiving table centerpiece. Now, even though some of our family is far away, they are part of our Thanksgiving dinner, even if in just a small way.

While I created my photo cube for a Thanksgiving table, you can easily adapt this project for any season or holiday – including Christmas. Substitute the raffia with ribbon, change the paint color, and change out the photos or layouts to match the theme and you have an inexpensive decoration that is also full of memories.
Note: This project has been compensated as part of a social shopper insights study for Elmer’s #gluenglitter #collectivebias #CBias . This idea, and all opinions, are 100% my own.
Samantha @ Lillian McKay says
I love this idea!! So fun to do for any holiday!! I also never knew you could curl raffia.
Karen @ Tasty Trials says
What fun centerpieces! I love the personal touch for the table…really cute!
Amy @ The Mom Hood says
This turned out great! And I love that it could be used any time, not just for Thanksgiving!